Twinmotion 2022.1
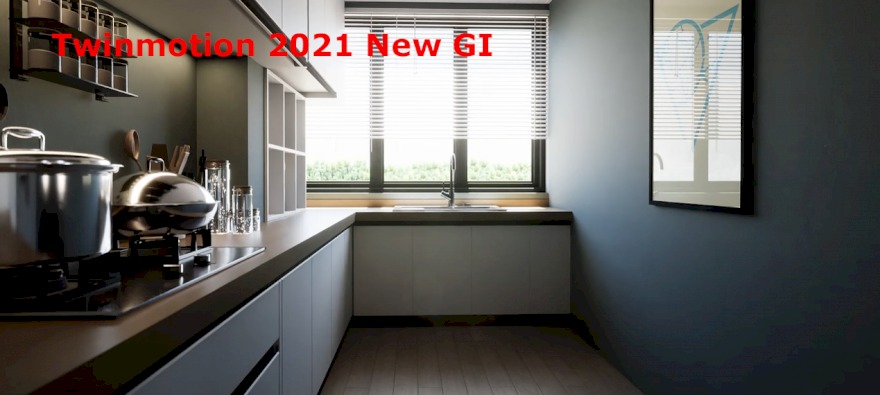
The great giant is waking up.
Epic has made the biggest expected difference with the latest Twinmotion update.
Falling behind its competitors in photorealism, Twinmotion closed the gap with this update.
However, it may be a little slow in creating photo-realistic images in tests.
Enscape d5 render still seems faster.
However, quality visuals and speed depend on your settings.
Epic loves competition. And he slowly opens the cards in his hand.
Twinmotion 2022.1 Preview 1 is now available.
Download the latest release from the Epic Games launcher.
Feel free to open a discussion to share your thoughts or report a bug regarding this release.
New features
Path Tracer
We’ve integrated a Path Tracer rendering engine to improve the overall fidelity of the rendering generated by Twinmotion. You can choose between Path Tracer or rasterization in the viewport and control the quality of each in the output dock
How to use:
- The Path Tracer can be enabled/disabled via a button on the toolbar. When the Path Tracer is activated, a progress wheel appears to indicate the convergence of the rendering depending on the current Path Tracer quality settings.
Clicking on this progress wheel will give you access to three quick settings, Low/Medium/High, corresponding to the number of samples used for the calculation; the higher the number of samples, the longer the calculation time. The three quick settings of the Path Tracer can be customized via the settings of the Preferences panel (Edit -> Preferences). - In the settings dock, there are two new settings: Renderer and Lighting. Renderer will enable you to choose between Path Tracer or real-time rendering, as well as offering new parameters for you to refine your rendering.
- For each media type, (Image, Panorama, or Video), you can choose between Path Tracer or real-time rendering modes.
- You can switch from one rendering mode to the other using the keyboard shortcut R.
- The Path Tracer also enables you to render orthographic top views with accurate shadows and lighting.
Note and limitations:
- Requires DX12
- Requires GPU supporting raytracing
- Not supported on macOS
- Performance will vary depending on GPU
- There is currently no convergence estimation
- The following features are not supported:
- Twinmotion Cloud Presentations
- Caustics
- Decals
- Weather height fog
- Volumetric light shafts
- Light haze
- Point clouds
- Flag animation
- Sun shape visibility
- Known issues:
- It is not possible to interact with the Gizmo in the viewport
- Not working with the Note tool
- Not working with the Measure tool
- Not working with one side of the sail of some sailing boats
- Not working with the transparency of water materials
- Not working with weather particles (snow and rain)
- Not working with Google map textures
Graphic hardware support detection mechanism
To run, the Path Tracer requires a DirectX 12 compatible graphics card (DXR).
The initialization of DirectX 12 requires more video memory than DirectX 11; knowing that the lack of memory may causes instabilities, we chose to activate DirectX12 only if these two conditions are met.
- The GPU supports ray tracing (DXR)
- The GPU has at least 8 GB of VRAM
If these two conditions are not met, DirectX 11 will be activated by default and the Path Tracer will not be activated.
If these two conditions are met, DirectX 12 will be activated and the Path Tracer will be supported.
However, it will be possible to switch from DirectX 12 to DirectX 11 via the Preferences panel to avoid DirectX 12 instabilities; Path Tracer will be deactivated in this case.
It is not recommended, but if you have a DXR-capable GPU with less than 8GB of VRAM you can switch from DirectX 11 to DirectX 12 to enable the Path Tracer functionality.
HDRI Skydome
We’ve integrated HDRI skydomes to increase the visual realism of images, videos, panoramas, and Presentations in Twinmotion Cloud. You can switch from a dynamic sky to the HDRI Skydome, leveraging the lighting from the HDRI texture with the Path Tracer.
How to use:
- Use the toggle to enable the feature under Lighting in the Settings dock, then click More to access the feature’s dock. You can use any of the skies in the Skydome library, or load your own using the file loader. The expected type of file is HDRI (easily findable on the internet) with .exr or .hdr file format, and equirectangular image format (typical for HDRIs).
- Using the Intensity and Ambient sliders, you can change skydome background and scene lighting (from HDRI) intensities.
- The Match sun toggle makes the sun position fixed to the sun of the skydome.
- The Rotation slider allows you to rotate the skydome horizontally.
- The HDRI affects lighting toggle determines whether the skydome affects the scene’s lighting or not.
- The Smog toggle determines whether the smog affects the skydome or not.
- You can also find resolution settings for the skydome in the settings preference panel (Edit -> Preferences -> Rendering).
Notes and limitations:
- HDRIs can’t be properly rendered in orthographic views. The viewport will display black.
Point cloud support
Twinmotion now supports laser-scanned data from popular formats, typically scanned in the context of architectural or industrial applications.
How to use:
Point cloud files can be imported from the Import dock and are managed like any other import item:
- Point cloud objects are added as a new object type.
- Point cloud objects have collision volumes (invisible to the user) that permit selection, dragging and dropping of assets, and object painting. They receive shadows and lights and have properties that enable you to change their appearance, regenerate collisions, cast shadows, etc.
- Detailed documentation can be found here.
Notes and limitations:
- No editing functionality
- Not compatible with Datasmith Exporter plugins
- Not supported by the Path Tracer
- Cannot be exported in a cloud Presentation
- *.E57 format is not supported on macOS
3Dconnexion mouse support
We’ve made 3D navigation more fluid and efficient for all SpaceMouse owners. In addition, the 3Dconnexion device offers seamless switching between different 3D applications, including Unreal Engine.
How to use:
- Set Twinmotion as the active window and open the 3Dconnexion menu.
- You will have access to a Twinmotion menu with several categories and can assign the features to your mouse’s buttons (a predefined set of controls is provided).
Note and limitations:
- 3Dconnexion device is fully supported on Windows only
Material Substitution Table
We’ve integrated a definable mapping table for substituting materials using the Datasmith workflow (uDatasmith file or Direct Link). It is fully customizable and enables you to replace source materials with Twinmotion-quality materials (even from the user library) and to define all settings such as scale, color, etc. in the table.
How to use:
- When importing a file using Datasmith, you can select and update the Material Substitution Table.
- The Datasmith import / Direct Link process works in the following order:
- The Datasmith scene is read in memory.
- The Collapse option is executed (Keep hierarchy, Collapse by material, Collapse All).
- The CSV file passed as input (material substitution table) is parsed and substitution is executed.
- At the end of this process, the scene is visible in Twinmotion
- Detailed documentation can be found here.
New Quixel assets: Plants and Decals
We’ve integrated the Quixel Megascans Plants and Decals categories into the Twinmotion asset library. Assets are stored on the cloud until downloaded for use locally.
Notes and limitations:
- Texture size limit is 2K
- 3D Plants cannot be used with the Paint Vegetation or Scatter Vegetation tools
New furniture assets
Hundreds of new downloadable furniture assets are now available.
How to access:
These assets are mainly located in the following categories:
- Furnitures/Home/Livingroom/Chairs/
- Furnitures/Home/Kitchen/Chairs/
- Furnitures/Home/Livingroom/Tables/
New demo scene: ‘Lakehouse retreat’
A new demo scene is available in File -> Demo scenes, enabling you to explore a range of indoor and outdoor features.
Conversion status prompt
We now display an information prompt panel when users are about to open a file created with a previous version of Twinmotion. To help users keep track of their files, we now explicitly indicate that the file is being converted and will not override existing files.
Twinmotion Cloud: Link sharing & Presentation updating
You can now share a Presentation by copying its link (and optional password) into any existing communication. Email sharing from within Twinmotion Cloud is being deprecated, but invites already sent will remain valid, and will link to the latest Presentation version.
We’ve also added support for updating Presentations to ensure that a Presentation’s link will always provide access to the latest version, so there will be no need to resend a link to stakeholders with each update. When a new version of an existing Presentation is uploaded, it will replace the existing one in the drive.
Twinmotion Cloud: Panorama Sets
We have implemented a solution to easily share sets of rendered 360 panoramas to give your clients curated, lightweight, and high-fidelity lenses into a project.
Notes and limitations:
- A maximum of 100 panoramas can be added to each set.
Improvements
Center pivot & Local axis tools
We’ve improved the Gizmo on imported objects so it is no longer located far from the object. The Center pivot tool will enable you to relocate the Gizmo on the low center of the selected objects. The Local axis tool will enable you to switch from a world-oriented to a local-oriented Gizmo and provide better control during placement and duplication of objects.
How to use:
Pivot-related functionalities are grouped under the last button in the horizontal toolbox in the toolbar.
- Base pivot will place the pivot to the lower face center of the local space bounding box.
- Reset pivot resets the pivot offsets of selected objects to zero: their pivots coincide with the translation of their matrix.
- Clicking on Toggle Local/World Axis will switch between the world space (Gizmo axes are aligned with the world coordinate system) and the local space (Gizmo axes are aligned with the local coordinate system).
Note and limitations:
- You cannot edit pivots of particles or paths
- You cannot edit pivots of multiple objects in local space
- The scale Gizmo is always in local space
Twinmotion editor minimal UI
We have added the option to select, move, and delete objects in full-screen mode, enabling you to have a viewport completely free of all interfaces for a better immersive experience.
How to use:
You can now perform the following actions in full-screen mode (press F12 to activate):
- Move (5), Rotate (6), and Scale (7)
- Save (CTRL+S) and save as (CTRL+Shift+S)
- Undo (CTRL+Z) and redo (CTRL+Y) actions
- Copy (CTRL+C) and paste (CTRL+V) objects in the viewport
- Delete (Delete) objects
- Cycle through transform tools (TAB)
- Frame (F) the selected objects
- Change the selection
- Open (CTRL+O) a scene
- Show/Hide helpers (G)
Snow shader
We’ve made the snow materials more realistic with the use of sub-surface scattering, and improved the appearance masks to make the transitions between areas of snow coverage and no snow coverage more aesthetically pleasing.
Notes and limitations:
- The Path Tracer does not support sub-surface scattering
- Rotating object will have sliding UVs
- Landscape doesn't currently support sub-surface scattering
Decals
Advanced users use decals to improve the realism of their scenes in terms of lighting, shadows, and effects. We have implemented the following:
- Improved shadow handling
- Exposure of all PBR channels
- Refined controls:
- The Minimum offset value has been set to allow the use of the slide bar at the bottom without the decals disappearing.
- Decals are now tintable and the luminosity of their base color can be adjusted.
- Decals now have a Settings control that embeds Reflectivity, Bump, Glow, and Metalness inputs and settings.
- The Size value can now be set to two decimal places to enable more precise downsizing.
Notes and limitations:
- Decals cannot yet use a parallax effect
- Not supported by the Path Tracer
VR support
We’ve added VR-specific rendering quality settings and automatic adjustments setup, fixed bugs, corrected LOD switching, and improved navigation and UI.
How to use:
- Open the Preferences dialog box (Edit -> Preferencesor Ctrl + P keyboard shortcut), then select the Quality tab. The Quality settings dialog box now contains distinct rendering quality settings for desktop application mode and for VR application mode. You can use the Desktop or the VR button to select which application you want to set settings for.
- For both application modes, you can:
- Set a global quality level (from Low to High) to be applied to each rendering setting (Shadows, View distance, Effects, etc.). To do this, click the left column icons.
- Set a fine grain custom quality setup. For each rendering setting, you can select a quality level (from Low to High) using the rendering settings grid.
- When setting up the quality settings for the VR application mode, you can use the dynamic VR quality options: VR Dynamic Quality, Use VR headset threshold, Activation threshold to control the automatic rendering features adjustments.
Notes and limitations:
- The Auto button (automatic quality setting based on your current hardware configuration) is only available for desktop application mode.

